


Our cheesy taco breadsticks appetizer is a total crowd-pleaser that turns your favorite taco night into a shareable, dippable treat. Inspired by the bold flavors of Tex-Mex cuisine, this recipe cleverly wraps seasoned beef and gooey cheese in a golden pizza dough crust. It’s the ultimate party starter that disappears almost as fast as you can make it. I love how it brings everyone together with minimal fuss and maximum flavor.
Why You'll Love This Recipe
- Perfect for feeding a crowd with almost no effort
- Packs all your favorite taco flavors into one fun, dippable bite
- Uses pre-made dough for a brilliant shortcut everyone appreciates
- Kids and adults will both fight for the last one
- My friends ask me to bring these to every gathering
Ingredients You’ll Need
- Olive oil: used to sauté the onions and beef, adding a subtle fruitiness that starts the flavor base. A good extra virgin olive oil works beautifully here.
- Ground beef 85% lean: provides a rich, meaty foundation with just enough fat for incredible flavor without being greasy. Brown it well for the best texture.
- Yellow onion: finely chopped and cooked until soft to build a sweet, aromatic base that balances the spices perfectly.
- Taco seasoning: the flavor powerhouse that gives the beef its signature savory, slightly smoky kick. You can use your favorite store-bought blend or make your own.
- Water: helps the seasoning coat the beef evenly and creates a saucy mixture that won’t dry out in the oven.
- Pre-made pizza dough: the ultimate time-saver that creates a soft, chewy, and golden vessel. Let it come to room temperature for easier rolling.
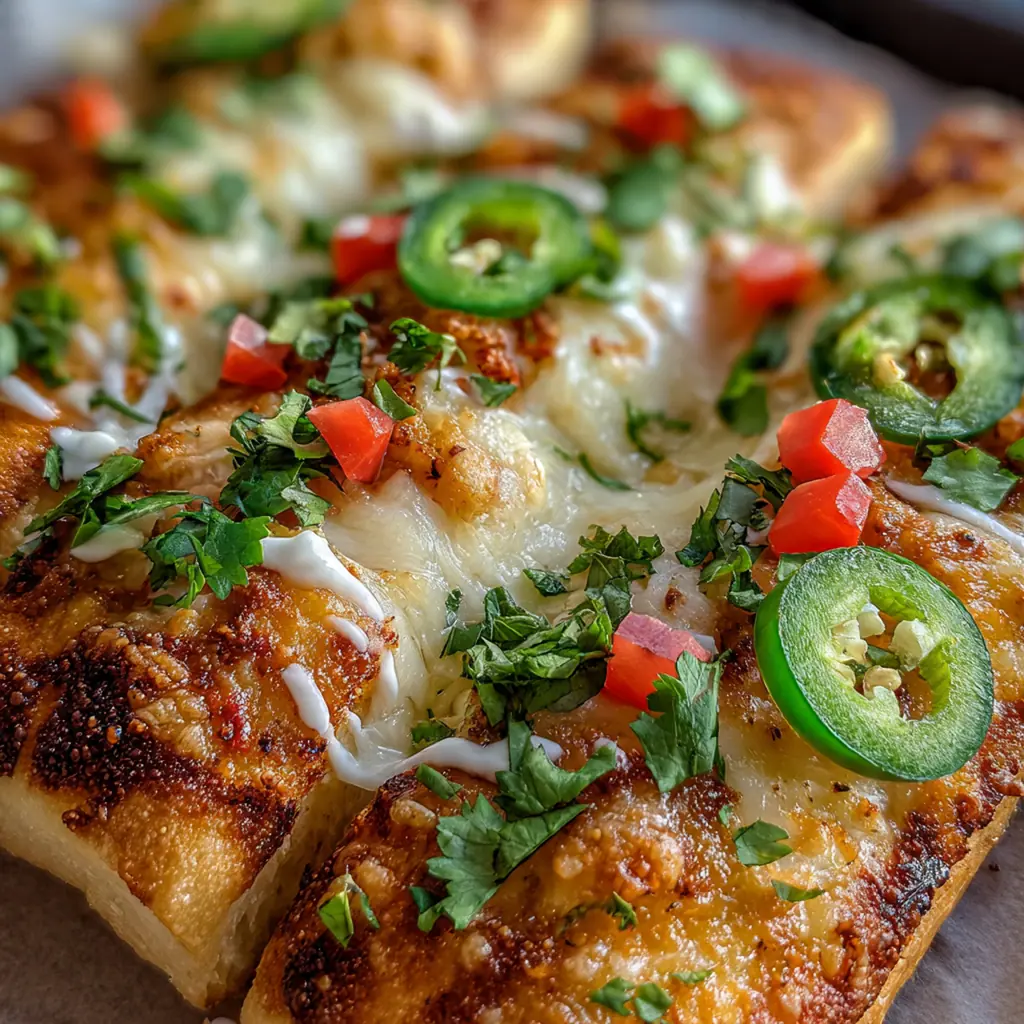
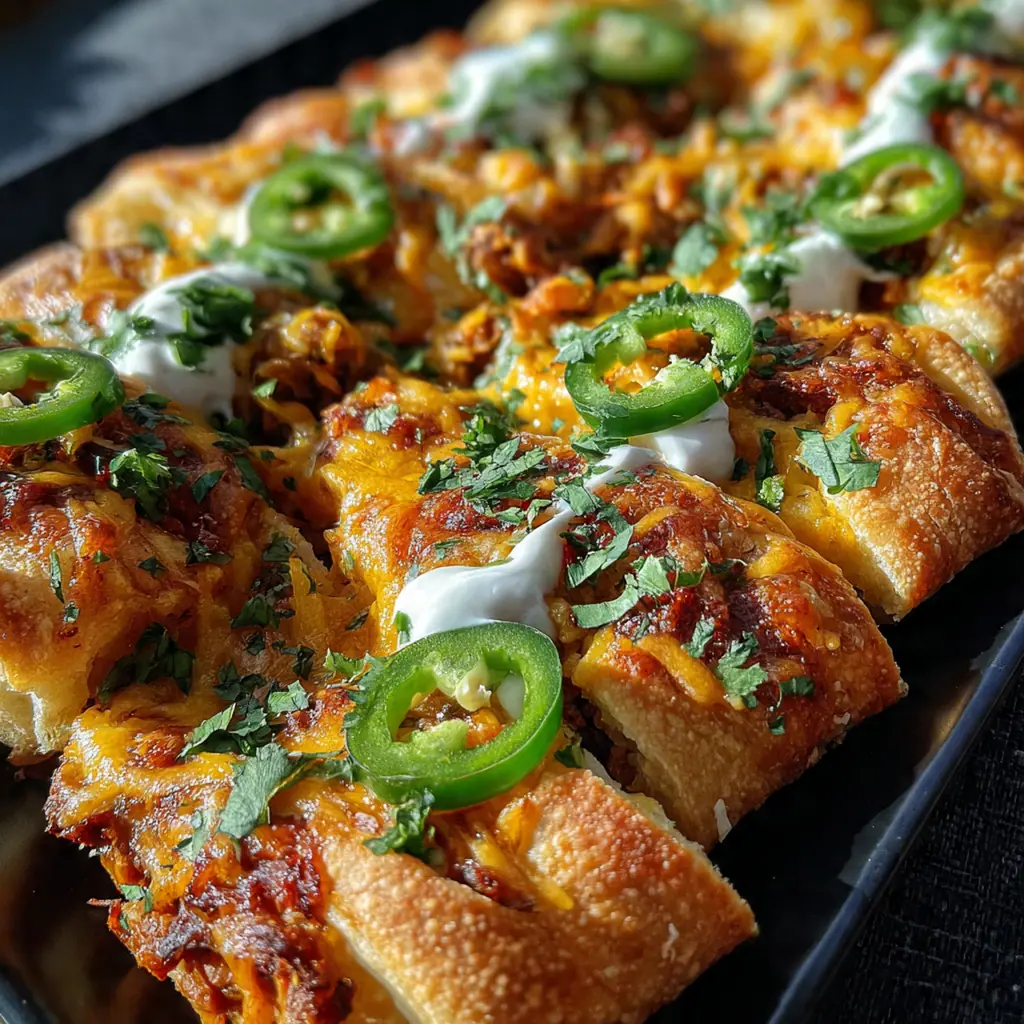
- Shredded cheddar cheese: offers a sharp, tangy flavor and that classic orange melt everyone loves. Pre-shredded bags are fine, but block cheese melts smoother.
- Shredded Monterey Jack cheese: brings a creamy, mild melt that beautifully complements the sharper cheddar. The combination creates the perfect cheesy pull.
- Melted butter: brushed on top to give the crust a gorgeous golden color and a rich, buttery flavor as it bakes.
- Garlic powder: mixed into the butter for an aromatic, savory boost that makes the whole kitchen smell amazing.
How to Make It
Preheat and Prep:
Start by preheating your oven to 400°F and lining a large baking sheet with parchment paper. This setup guarantees an easy release and virtually no cleanup, which is always a win in my book.
Cook the Aromatics:
Heat the olive oil in a skillet over medium heat and add your chopped onion. You’re looking for them to soften and become translucent, which takes about three to four minutes and builds a sweet foundation.
Brown the Beef:
Add the ground beef to the skillet and break it up with a spoon. Cook until there’s no pink left, then drain any excess fat. This step ensures your filling isn’t greasy.
Season the Filling:
Stir in the taco seasoning and water, then let it simmer for a few minutes until thickened. Taking it off the heat lets it cool slightly so it’s easier to handle when you assemble.
Roll and Fill the Dough:
On a lightly floured surface, roll your dough into a rectangle. Spread the taco meat evenly, leaving a small border, then sprinkle all that cheese over the top. The border is key for a good seal.
Roll and Slash the Log:
Tightly roll the dough from the long side into a log and pinch the seam closed. Place it seam-side down on your sheet and cut diagonal slits partway through the top. These slits help steam escape and create that breadstick look.
Add the Garlic Butter:
Mix the melted butter and garlic powder in a small bowl, then brush it generously over the entire log. This butter wash is the secret to that irresistible, golden-brown, flavorful crust.
Bake to Golden Perfection:
Bake for 18 to 20 minutes until the dough is cooked through and beautifully golden. Let it cool for about five minutes before slicing; this keeps the cheese from oozing out everywhere when you cut.
You Must Know
- Let the filled log cool for five minutes before slicing
- Pre-made dough is a fantastic shortcut that doesn’t sacrifice flavor
- That garlic butter wash is non-negotiable for the best crust
- I always make a double batch because they go so fast
Storage Tips
Store any leftover cheesy taco breadsticks in an airtight container in the fridge for up to three days. To bring back their magic, reheat them on a baking sheet in a 350°F oven for five to ten minutes until they’re warm and crispy again. I always avoid the microwave because it turns the crust soggy in seconds. They’re still pretty great cold straight from the fridge, but that quick oven refresh makes them taste freshly baked.
Ingredient Substitutions
If you’re out of ground beef, ground turkey or chicken works just fine, though you might want to add a tiny splash of oil since they’re leaner. For the cheese, a pre-shredded Mexican blend is a perfect swap, or use all cheddar if that’s what you have. Don’t have fresh onion? A quarter cup of frozen diced onions will do in a pinch. If you want to skip the meat altogether, a can of drained and rinsed black beans mashed slightly with the seasoning makes a great vegetarian version.
Serving Suggestions
Serve these warm with bowls of cool sour cream, chunky salsa, and maybe some guacamole or queso for a full dipping station. They’re fantastic alongside a big, crisp salad to balance the richness, or as part of a bigger spread with nachos and wings. For drinks, a cold Mexican lager, a tart margarita, or even a simple limeade rounds everything out perfectly. I usually just put the whole baking sheet in the middle of the table and let everyone dig in.
Cultural Context
This cheesy taco breadsticks appetizer is a fun, modern twist on classic Tex-Mex flavors, which themselves are a vibrant fusion of Northern Mexican and American Southwestern cooking. The concept of wrapping spiced meat and cheese in dough has roots in various handheld foods, from Mexican burritos to American stromboli. It’s a celebration of shareable, communal eating that’s perfect for today’s casual gatherings and game days. You’re taking familiar, beloved components and presenting them in a new, interactive way that’s guaranteed to get people talking and reaching for more.
Pro Tips
- Bake on the lower oven rack for an extra crispy bottom crust
- Use a pizza cutter to slice the dough log quickly and cleanly
- Chill sticky dough for ten minutes before rolling for easier handling
- Add jalapeños or black olives before rolling for a custom kick
- This is my go-to recipe when I need a surefire hit
Frequently Asked Questions
Pre-made pizza dough is ideal for these breadsticks, as used in this recipe. It provides the perfect chewy, golden base and saves significant prep time. You can find it in the refrigerated section of most grocery stores.
Yes! You can assemble the breadsticks, cover them tightly, and refrigerate for up to 6 hours before baking. For best results, brush with the garlic butter just before they go into the oven to ensure a golden, crispy top.
For a lighter option, try ground turkey or chicken seasoned with the taco mix. For a vegetarian version, use a plant-based ground meat alternative or even well-drained, seasoned black beans for a delicious twist.
The breadsticks are done when the crust is a deep golden brown and the cheese is completely melted and bubbly, about 18-20 minutes in a 400°F oven. Let them cool for 5 minutes before slicing to allow the cheese to set slightly.
Serve these Tex-Mex breadsticks with classic dips like fresh salsa, cool sour cream, creamy guacamole, or a side of queso for an extra cheesy experience. They’re perfect for game day, parties, or any casual gathering.