


These Pineapple Coconut Cheesecake Bars bring a little tropical sunshine straight to your dessert table, blending classic American cheesecake comfort with irresistible island flavors. You get the creamy, dreamy texture you love without the fuss of a springform pan or water bath. Every layer, from the buttery coconut crust to the sweet-tart pineapple topping, is designed for maximum flavor and satisfaction. It’s the kind of treat that makes any occasion feel like a special getaway.
Why You'll Love This Recipe
- The creamy cheesecake and tropical pineapple coconut combo is absolutely irresistible
- You skip the water bath for a much simpler process than a traditional cheesecake
- They are perfectly make-ahead and taste even better the next day
- You get that perfect balance of crunchy crust and smooth, creamy filling in every bite
- They are so portable and ideal for sharing at any gathering
Ingredients You’ll Need
- Graham cracker crumbs: they create a sturdy, sweet, and slightly spiced base that holds everything together perfectly, look for a fine, consistent crumb for the best texture.
- Sweetened shredded coconut: this adds essential tropical flavor and chew to both the crust and the topping, it toasts up beautifully for garnish if you have extra.
- Unsalted butter: melted butter binds the crumb crust so it firms up nicely when baked, using unsalted lets you control the final sweetness and salt level.
- Granulated sugar: it sweetens both the crust and the filling, creating a balanced dessert that isn’t overly cloying against the tangy cream cheese.
- Full-fat cream cheese: room temperature cream cheese is non-negotiable for a silky smooth filling without any lumps, the full-fat version gives you that classic rich texture.
- Large eggs: they provide structure and richness to the cheesecake layer, bringing them to room temperature prevents the batter from breaking or curdling.
- Vanilla extract: a touch of vanilla enhances all the other flavors in the filling, making the tropical notes shine even brighter.
- Full-fat canned coconut milk: this is your secret weapon for infusing deep coconut flavor into every bite of the creamy filling, just make sure you shake the can well first.
- All-purpose flour: a small amount acts as a stabilizer to help the cheesecake set firmly without cracking as it bakes and cools.
- Crushed pineapple in juice: the star of the topping, providing juicy texture and bright acidity, draining it extremely well is the key to success.
- Cornstarch: mixed with the reserved pineapple juice, it thickens the topping as it bakes so it stays in place and doesn’t make the bars soggy.
How to Make It
Preheat and Prepare Your Pan:
Start by heating your oven to 350°F and lining your square baking pan with parchment paper, leaving some overhang on two sides. This little trick is a game-changer for lifting out the whole slab of cheesecake bars cleanly later on. You’ll thank yourself when it’s time to slice.
Make and Bake the Crust:
In a bowl, mix the graham cracker crumbs with half the coconut, the sugar, and melted butter until it feels like wet sand. Press this mixture firmly and evenly into your prepared pan, using something flat like a measuring cup to really compact it. Bake it for just 10 minutes until it’s set and fragrant, then let it cool slightly while you work on the filling.
Create the Creamy Filling:
With an electric mixer, beat the softened cream cheese and sugar together until the mixture is completely smooth and creamy, scraping down the bowl as needed. Add the eggs one at a time, mixing just until each disappears, then blend in the vanilla, coconut milk, and flour on low speed. You want a smooth, lump-free batter but you don’t want to overmix and incorporate too much air.
Assemble the Layers:
Pour your creamy cheesecake batter over the warm crust and gently tap the pan on the counter to release any trapped air bubbles. In a separate bowl, whisk the cornstarch with the reserved pineapple juice, then toss it with the very well-drained crushed pineapple. Spoon this pineapple mixture evenly over the cheesecake layer and sprinkle the rest of the shredded coconut on top.
Bake to Perfection:
Bake the bars for 35 to 45 minutes. You’re looking for the edges to be puffed and set while the center still has a slight jiggle when you gently shake the pan. The top will turn a lovely light golden color, and your kitchen will smell incredible.
Cool and Chill Completely:
Let the pan cool completely on a wire rack at room temperature before you even think about moving it. This gradual cooling helps prevent cracks. Then, transfer it to the refrigerator to chill and set fully for at least four hours, though I truly recommend leaving it overnight for the cleanest slices and best flavor.
Slice and Garnish:
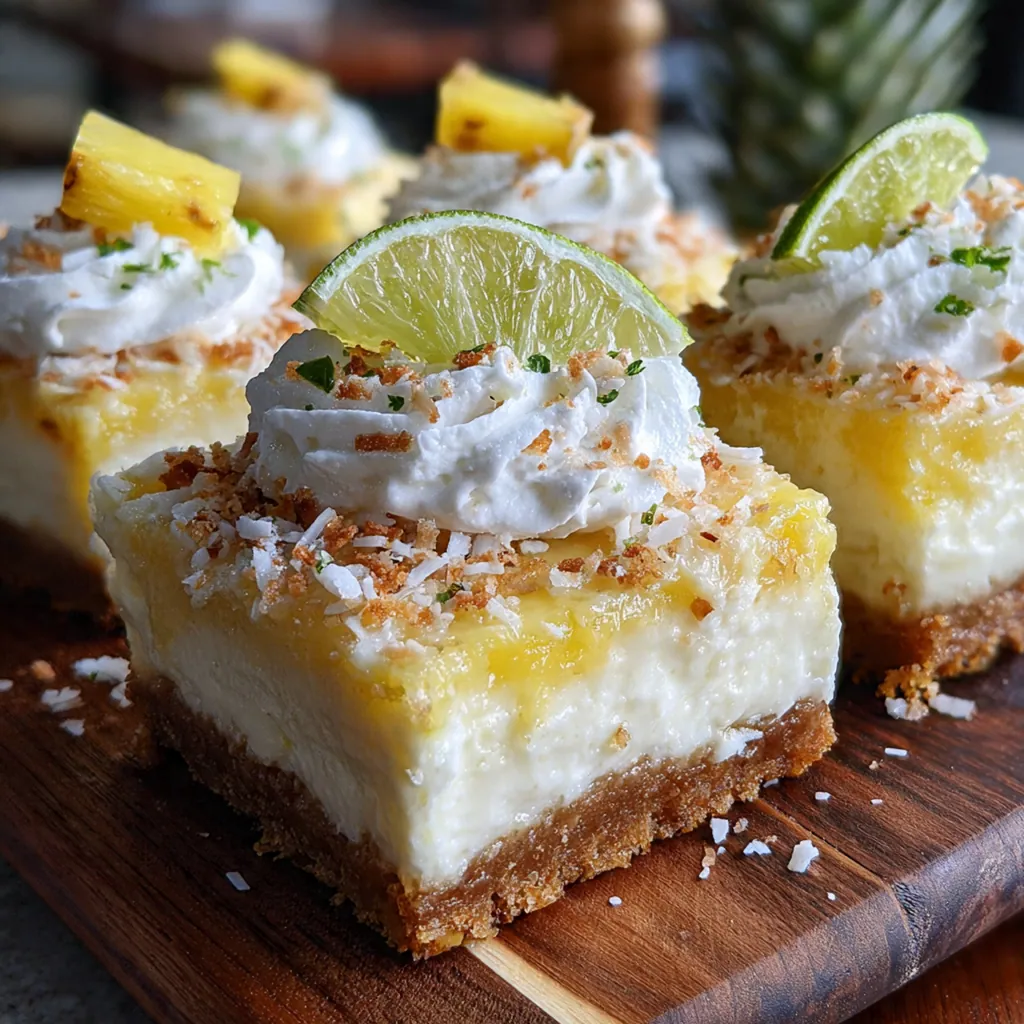
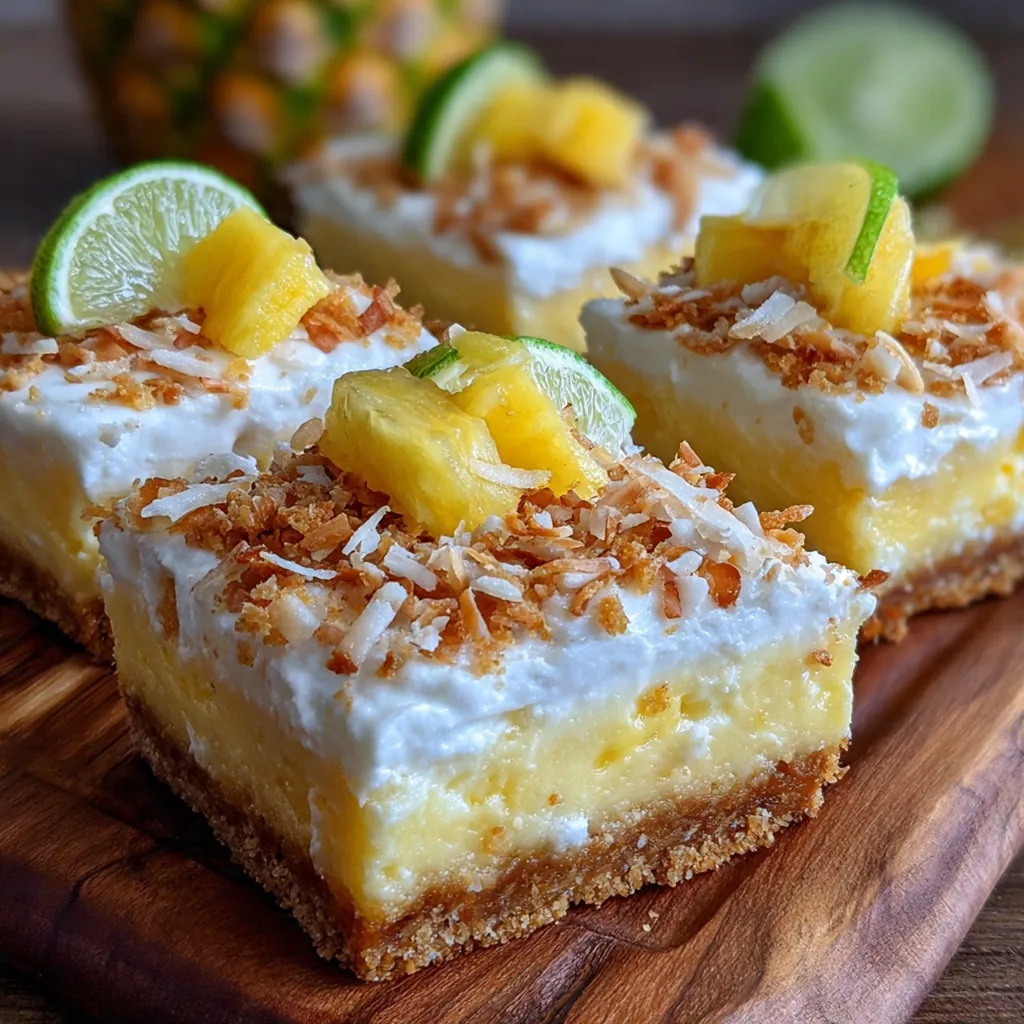
Once thoroughly chilled, use the parchment paper overhang to lift the entire cheesecake slab out of the pan and onto a cutting board. Use a sharp knife, wiping it clean between cuts, to slice into 16 neat bars. If you’re feeling fancy, top them with a sprinkle of toasted coconut or a fresh pineapple chunk right before serving.
You Must Know
- Draining the pineapple extremely well is the single most important step for perfect bars
- Letting cream cheese and eggs come to room temperature guarantees a silky filling
- Chilling overnight isn’t just a suggestion, it’s essential for flavor and clean cuts
- That toasted coconut garnish? It adds a whole new layer of flavor and crunch
Storage Tips
Store your Pineapple Coconut Cheesecake Bars in an airtight container in the refrigerator, where they’ll keep their perfect texture and flavor for up to five days. For longer storage, you can freeze them beautifully for up to two months; just wrap each bar tightly in plastic wrap, pop them all into a freezer bag, and thaw overnight in the fridge before serving. I often make a batch just to have a few tucked away in the freezer for last-minute guests or a sudden tropical dessert craving.
Ingredient Substitutions
If you need a gluten-free version, simply swap the graham cracker crumbs for an equal amount of certified gluten-free crumbs or even crushed gluten-free cookies. For the canned coconut milk, a well-shaken can of coconut cream will work in a pinch for an even richer result, but don’t use the light version as it can affect the filling’s texture. While fresh pineapple is wonderful for garnish, I don’t recommend using it for the topping itself because canned crushed pineapple has the right consistency and controlled moisture level to bake up perfectly without making the bars wet.
Serving Suggestions
I love serving these bars straight from the fridge, all on their own for a simple but impressive treat. They pair wonderfully with a cup of strong coffee that cuts through the richness or a cold glass of milk for the ultimate comforting combo. For a real tropical party vibe, arrange them on a platter alongside other island-inspired bites and offer a pitcher of homemade piña coladas or iced tea – it turns dessert into a mini-vacation for your friends and family.
Cultural Context
While the classic baked cheesecake is a deeply American dessert icon, these bars take a joyful detour to the tropics, a fusion that speaks to our love of vacation flavors. The pairing of pineapple and coconut is a hallmark of mid-century tiki culture and Polynesian-inspired cuisine that became wildly popular across the United States. This recipe modernizes that vibe, transforming it into a portable, shareable bar cookie that fits perfectly into today’s potlucks and gatherings, keeping the spirit of a sweet escape alive in every creamy, crunchy bite.
Pro Tips
- Press your crust down as firmly as you can for a solid base that won’t crumble
- Use a fine-mesh strainer and really press on the pineapple to drain every last drop
- Toast that extra coconut for garnish in your already-hot oven while the bars cool
- A tiny splash of coconut extract in the filling amplifies the tropical notes
- Chilling overnight is my non-negotiable secret for perfect slices every single time
Frequently Asked Questions
Yes, you can use about 1 1/4 cups of finely chopped fresh pineapple. Gently cook it with a little sugar and water until softened, then drain it very well and let it cool completely before using to prevent excess moisture.
Absolutely! These bars are excellent for making ahead. Let them cool completely, then cover tightly and refrigerate for up to 3 days. The flavors meld and intensify, making them even more delicious.
For the creamiest filling, stick with full-fat canned coconut milk. In a pinch, you can use an equal amount of full-fat sour cream or plain Greek yogurt, though the tropical coconut flavor will be less pronounced.
The bars are done when the edges are puffed and set, but the center still has a slight jiggle when you gently shake the pan. It will firm up as it cools. Overbaking can cause cracking.
These rich, tropical bars are fantastic on their own. For extra flair, serve with a dollop of whipped cream, a sprinkle of toasted coconut, or a drizzle of caramel sauce. A cup of strong coffee balances the sweetness perfectly.