


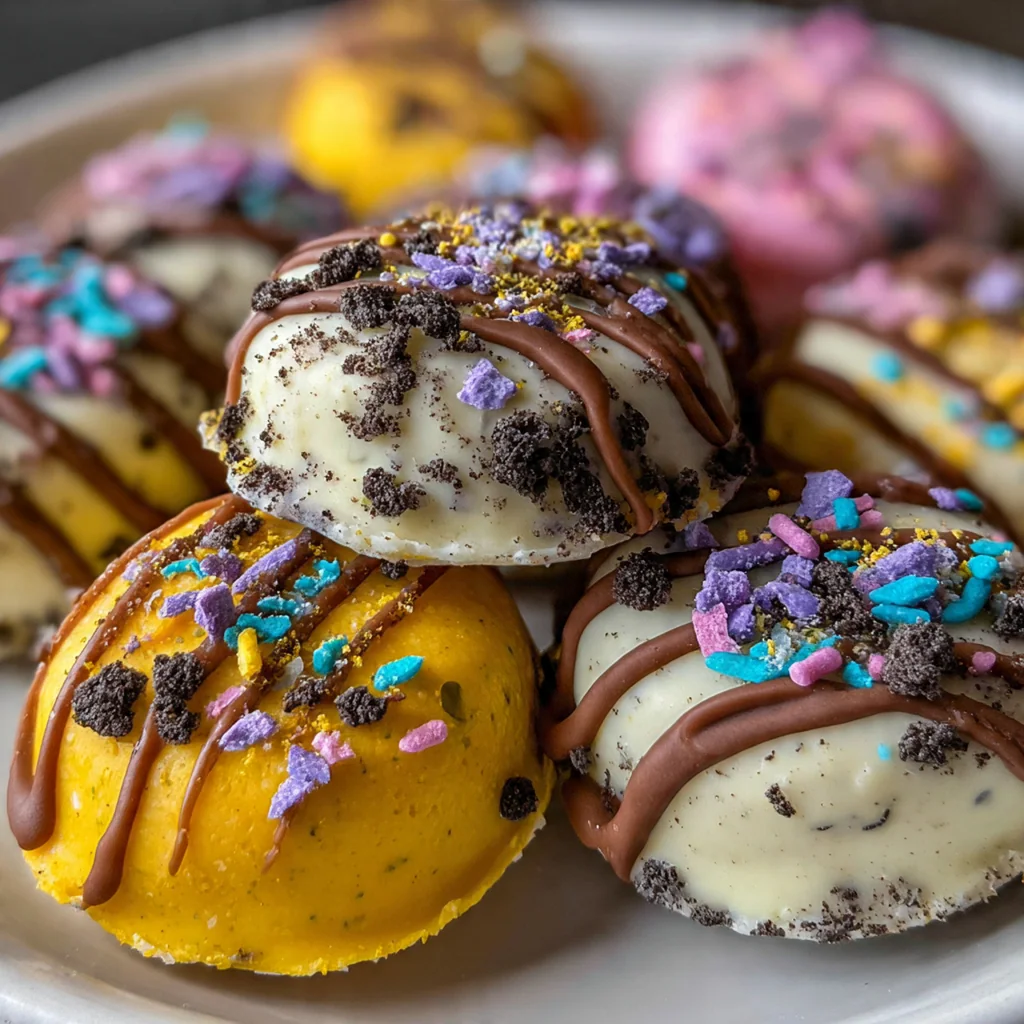
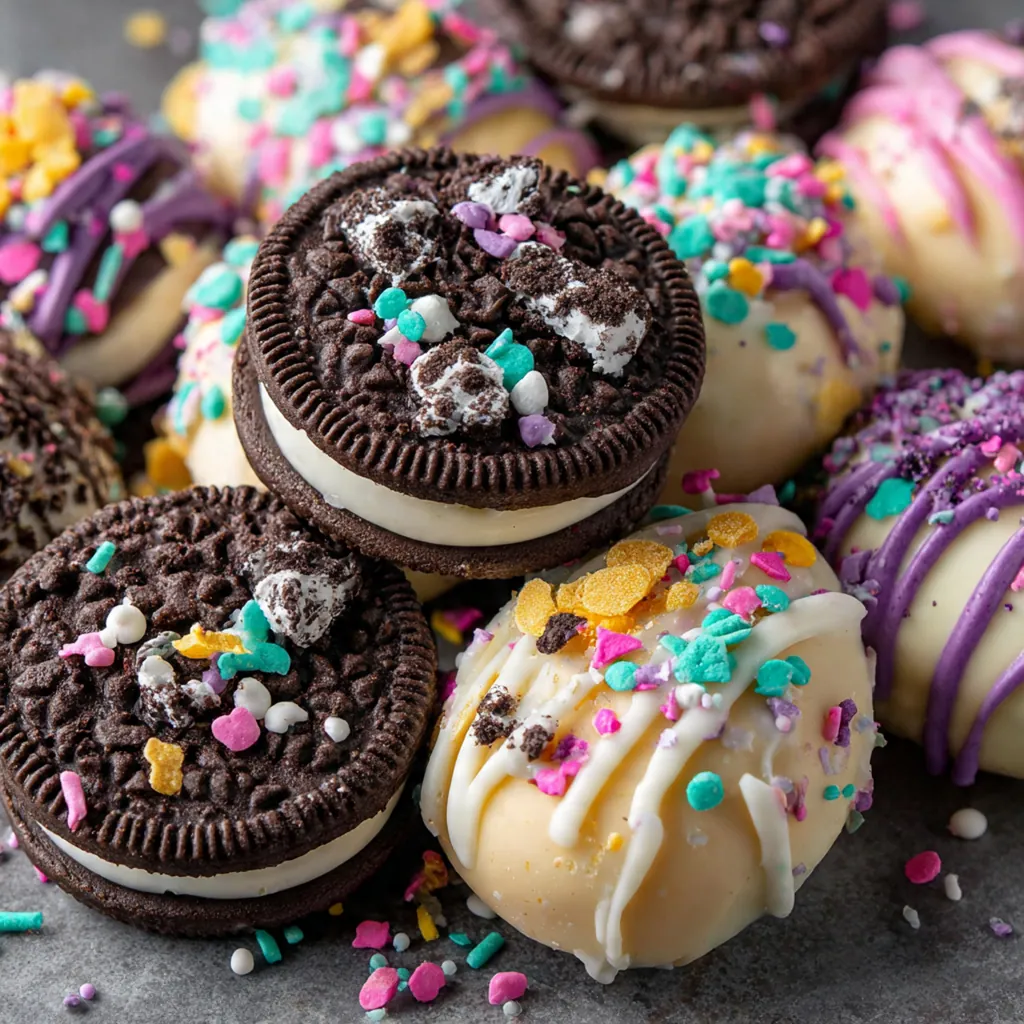
Easter Oreo Egg Truffles are the sweetest way to celebrate spring, combining the beloved crunch of Oreo cookies with a creamy, dreamy filling. These no-bake bites are incredibly simple to make, requiring just a handful of ingredients and no oven time at all. The result is a rich, chocolatey treat shaped like adorable eggs, perfect for filling Easter baskets or adding to your holiday dessert spread. I love how they bring a touch of homemade charm to the festive season while looking professionally made.
Why You'll Love This Recipe
- No baking required – perfect for hot days or busy schedules
- Only 7 basic ingredients needed plus decorations
- Kid-friendly activity – great for decorating together
- Can be made up to 5 days ahead of Easter
- These adorable pastel shapes make them perfect for Easter baskets
Ingredients You’ll Need
- Oreo cookies: These provide the chocolatey base and sweet crunch. Using the whole cookie, including the creamy filling, creates the signature flavor and helps bind the mixture together.
- Cream cheese: This is the magic ingredient that makes the filling creamy and holds it all together. Softening it to room temperature ensures a smooth, lump-free texture.
- Vanilla extract: A small amount enhances the chocolate flavor and adds warmth. Pure vanilla extract gives the best, most authentic taste.
- White chocolate melting wafers: These create the smooth, snappy outer shell. Melting wafers are designed to melt evenly and set firmly, making them ideal for dipping.
- Vegetable oil or coconut oil: Adding a bit of oil to the chocolate thins it out for a perfect coating consistency. This helps the chocolate flow easily and prevents it from cracking.
- Pastel sprinkles: These add festive color and a fun crunch. They’re best added while the chocolate coating is still wet so they stick properly.
- Candy melts in pastel colors: Used for drizzling decorative lines, these melts add extra color and flavor. They come in vibrant shades like pink, blue, yellow, and green.
- Flaky sea salt: An optional garnish that adds a sophisticated contrast to the sweet filling and coating. A tiny pinch goes a long way in balancing the flavors.
- Edible glitter: For an extra touch of sparkle and magic on your holiday treats. This is completely optional but makes the truffles look incredibly festive.
- Mini chocolate chips: These are perfect for adding cute eyes if you want to decorate your eggs like little critters. They add a nice textural element too.
How to Make It
Prepare Your Workspace:
Line a large baking sheet with parchment paper. This creates a non-stick surface for your truffles and makes cleanup incredibly easy. Having your workspace ready before you start mixing keeps the process smooth and stress-free.
Crush the Oreos:
Place the Oreo cookies in a food processor and pulse until they become fine crumbs. If you don’t have a food processor, put them in a zip-top bag and crush them with a rolling pin until they resemble sand. The finer the crumbs, the smoother your truffle filling will be, so take your time with this step.
Mix the Filling:
Transfer the cookie crumbs to a large mixing bowl. Add the softened cream cheese and vanilla extract. Mix with a rubber spatula or an electric mixer until completely combined, about 2-3 minutes. You want a uniform, thick paste that holds together firmly when you press it between your fingers.
Shape the Eggs:
Scoop the mixture using a 1-inch cookie scoop or a tablespoon measure. Roll each portion between your palms to form a ball, then gently roll one end to create an egg shape. Place each shaped truffle onto your prepared baking sheet, leaving a little space between them.
Chill to Set:
Refrigerate the shaped truffles for at least 15 minutes until they are firm to the touch. This step is crucial because cold truffles are much easier to dip without falling apart. You can use this time to prepare your melting chocolate.
Melt the Chocolate:
While the truffles chill, melt the white chocolate wafers with the oil in a microwave-safe bowl. Heat in 30-second intervals, stirring well between each, until the chocolate is completely smooth and fluid. Be careful not to overheat, which can cause the chocolate to seize or burn.
Dip and Coat:
Remove the chilled truffles from the refrigerator. Using a fork or a dipping tool, dip each egg-shaped truffle into the melted white chocolate, ensuring it’s fully coated. Lift it out, gently tap the fork against the bowl to remove excess chocolate, and return it to the parchment paper. The coating should be even and glossy.
Add Decorations:
While the chocolate coating is still wet, immediately decorate with your pastel sprinkles or drizzle with melted pastel candy melts. Work quickly during this stage, as the chocolate begins to set within about 5 minutes. For drizzles, use a fork or a small piping bag for more control.
Let Them Set:
Allow the truffles to set at room temperature for 15 minutes, or place the baking sheet in the refrigerator for 10 minutes until the coating is firm. Once fully set, your Easter Oreo Egg Truffles are ready to eat. They should have a satisfying snap to the coating when broken.
You Must Know
- Make sure your cream cheese is very soft to avoid lumps
- If the mixture is too sticky, chill it for 10 minutes first
- Adding a little oil to the chocolate helps it flow smoothly
- Freezing shaped truffles for 15 minutes gives a cleaner dip
- Store them in the fridge for the best texture
Storage Tips
Store your finished truffles in an airtight container in the refrigerator for up to 7 days to maintain freshness. Layer them between sheets of parchment paper to prevent sticking and protect the delicate chocolate coating. If you need to make them even further in advance, they can be frozen for up to 2 months; just thaw them in the refrigerator overnight before serving. Avoid leaving them at room temperature for more than 2 hours, as the cream cheese filling requires refrigeration for food safety and texture.
Ingredient Substitutions
If you need a gluten-free version, simply swap the regular Oreos for your favorite brand of gluten-free sandwich cookies – the results are just as delicious. For a dairy-free option, use a dairy-free cream cheese alternative and ensure your chocolate wafers are also dairy-free, which many brands now offer. You can also change up the sprinkles and candy melts to fit any theme, like red and green for Christmas or orange and black for Halloween. The vanilla extract is optional if you don’t have any on hand, though it does add a nice warmth to the flavor.
Serving Suggestions
Arrange your finished truffles in mini cupcake liners for a polished look and easy serving at any Easter gathering. They make fantastic edible favors, so pack them in Easter baskets for a sweet homemade surprise instead of store-bought candy. For a stunning dessert display, arrange them on a decorative platter alongside other spring treats like lemon bars and sugar cookies. Pair them with a cold glass of milk or a steaming cup of hot chocolate for a classic and comforting combo.
Cultural Context
Oreo truffles represent a wonderful example of modern American holiday confectionery, blending the iconic, beloved cookie with the timeless appeal of bite-sized truffles. While traditional truffles trace their roots to European candy-making, this no-bake version is a quintessentially American creation born from home kitchens and community potlucks. It perfectly captures our love for convenience foods that still feel special and handmade. Making these for Easter has become a cherished tradition for many families, turning simple ingredients into festive, shareable joy that bridges the gap between store-bought ease and homemade heart.
Pro Tips
- If your mixture seems too crumbly, add a tablespoon more of softened cream cheese to bind it.
- Work in batches when dipping to keep the truffles cold, which makes coating them much cleaner.
- Use a toothpick to help dip the truffles for an even coating and less mess.
- Sprinkle a tiny bit of flaky salt on top right after dipping for a flavor upgrade.
- If the chocolate gets too thick while you’re working, gently reheat it in 10-second bursts.
Frequently Asked Questions
You can use regular Oreo cookies or seasonal Easter Oreos for these truffles. The recipe calls for one 14.3 oz package, which is perfect for creating the creamy base. Just make sure to scrape out the filling before crushing the cookies for the best texture.
Absolutely! These truffles are perfect for making ahead. Store them in an airtight container in the refrigerator for up to 1 week. You can also freeze the uncoated Oreo balls for up to 3 months, then thaw and dip in chocolate when ready to serve.
If you don’t have white chocolate melting wafers, you can use regular white chocolate chips with the added vegetable or coconut oil to help them melt smoothly. Milk chocolate or dark chocolate melts also work as delicious alternatives for a different flavor profile.
The chocolate coating is ready when it’s smooth, glossy, and sets firm within 10-15 minutes at room temperature. You’ll know it’s set when the truffles don’t leave fingerprints when gently touched. The chocolate should snap slightly when bitten into.
These truffles are perfect on their own as a sweet treat, but they pair wonderfully with coffee, milk, or hot chocolate for Easter brunch. Arrange them in decorative cupcake liners on a dessert platter, or package them in clear bags with ribbon for adorable Easter gifts.